Built-in Storage for Amsterdam Homes: Calm, Bright, and Clever
Fresh morning light loves a tidy room. In Amsterdam and across Noord-Holland, built-in storage is the calm backbone of a bright, effortless home. When storage is integrated—tuned to your walls, windows, and daily habits—it disappears visually and frees the space to breathe. Here’s how to think about built-ins that feel light, modern, and properly Dutch.
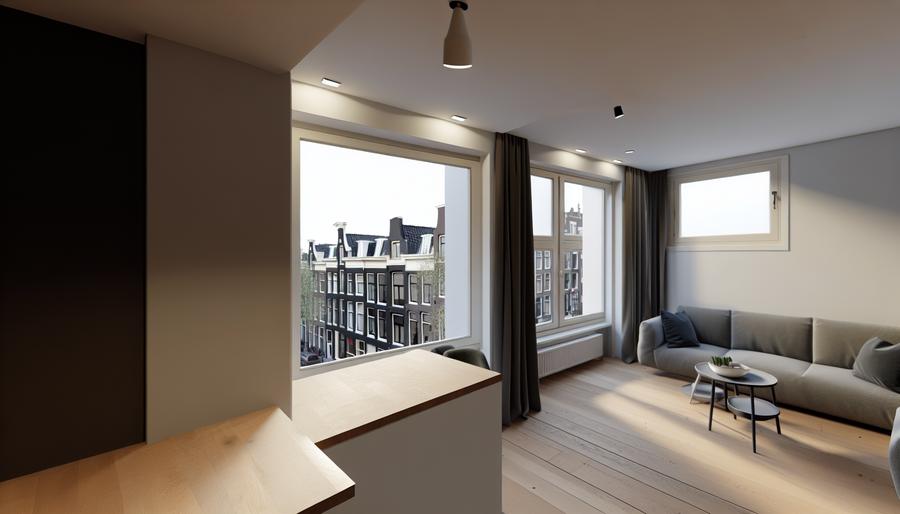
Begin with the envelope: light, lines, and living patterns
Before sketching doors and shelves, map the light. In our latitude, crisp white daylight bounces best off pale, matte finishes and soft-toned timber. A white-limewashed wall with oak or ash adds warmth without weight. Keep cabinet faces simple—flat, handleless, or with minimal pulls—and let the built-ins echo the room’s strongest lines: window heads, beam heights, and floor datum lines. The goal is a quiet rhythm, not a focal point.
Plan storage to match your morning routine. Coffee gear near the window bench you use at 08:00, coats and bike lights by the door, laptop dock behind a sliding panel by the dining table. Built-ins succeed when they shorten movements and hide friction.
Amsterdam realities: narrow stairs, old walls, and smart logistics
Many canal houses and portiekwoningen have staircases that refuse big furniture. Built-ins are the antidote because we fabricate in modular pieces that can snake up tight turns or be hoisted through a front window. If hoisting, coordinate with the municipality and your VvE for access and protection of common areas. We also consider removable plinths and split carcasses so future maintenance is easy.
Walls and floors in older homes—often on pile foundations—are rarely straight. Expect a 10–20 mm scribe gap strategy and shadow joints that make imperfections look intentional. Avoid over-relying on wall fixings in crumbly brick; use floor-bearing plinths with discreet wall restraints. In monument-listed interiors (Monumentenzorg), prioritize reversible solutions: freestanding units nested into niches, non-invasive cleats into existing joints rather than new holes, and no trimming of historical beams or skirting without permits.
Built-in ideas room by room
Hallway and over-stair volume: Use shallow cabinetry (200–300 mm) with full-height doors and integrated mail/keys trays. Over-stair voids can hide seasonal storage behind a flush panel. Add a slim bench with shoe drawers (350–400 mm deep) to keep the floor clear and mornings smoother.
Living room wall: Combine closed base cabinets (for tech and clutter) with open shelves above. Align the shelf datum to the window head to keep the eye calm. Consider reeded or frosted glass for segments you want to soften without going fully opaque.
Window benches and radiators: If you have radiators under tall windows, a bench with perforated fronts or a continuous grille preserves airflow. For homes moving to low-temperature heating, a convector bench can integrate storage at the ends—just maintain clear intake and exhaust paths.
Kitchen calm: A full-height pantry wall with 300–400 mm interior drawers swallows visual mess. Use toe-kick drawers for trays and baking tins. If stairs are tight, consider onsite-assembled carcasses and measure your appliance clearances obsessively—door swing, plug depth, and ventilation plinths included.
Bedroom and sloped ceilings: Fitted wardrobes should step with the ceiling line and use interior organization—double hanging, shallow drawers for knits, pull-out trays for shoes—so doors stay minimal. In compact Amsterdam bedrooms, 600 mm depth is standard for hanging; where that’s impossible, 450–500 mm with angled hangers still works.
Bathroom and laundry niches: Recess shallow cabinets (120–160 mm) into non-structural stud walls for medicines and toiletries. In older masonry, surface-mount a slim cabinet painted to match the wall for a near-invisible effect. For laundry, a stacked setup behind acoustic doors with a drip tray and service access respects Dutch noise rules and your neighbours.
Materials and details that keep spaces bright
For that fresh, bright-morning mood, pair matte white or off-white lacquer with light timber: oak, ash, or birch plywood, finished in hardwax oil. Edges should be honest—thin, square reveals, or a 2 mm shadow gap around door sets—to avoid heaviness. Use push-to-open where hands are often full; go for small blackened steel pulls where tactile feedback matters.
Interior carcasses in formaldehyde-low birch ply are robust and repairable. Adjustable shelves give lifespan flexibility. Add soft LED strips set to 3000–3500K inside tall units; motion sensors keep the outside visually clean. Where moisture is present, specify marine ply floors and sealed edges, especially in bathrooms and ground-floor spaces near older brick.
Permits, VvE, and technical coordination
If your home is part of a VvE, any changes touching common walls, shafts, or facades may require approval—even for a built-in that seems internal. Document fixings, ventilation paths, and any impacts on radiators or floor heating manifolds. In protected monuments, consult early with Monumentenzorg; reversible and non-destructive details are typically favoured, and paint systems may need to be breathable on historic plaster.
Thinking about energy performance? Built-ins can discreetly house a mechanical ventilation unit, compact heat pump, or insulation upgrades behind a service panel. Plan for clear airflow, condensate routes, and maintenance space. While the ISDE subsidy applies to certain installations rather than furniture, integrating the cupboard now avoids future rework and helps your Energy Label story.
Sizes that work (so you don’t have to guess)
- Hallway depth: 200–300 mm for coats on pegs; 350–400 mm for a sit-able bench with drawers.
- Bookshelves: 250–300 mm deep; 320–360 mm clear height for art books; add an occasional 420 mm bay for records.
- Wardrobes: 600 mm for standard hanging; 450–500 mm with angled rails in tight rooms.
- Under-stair drawers: 500–700 mm deep on heavy-duty runners; toe clearance 60–80 mm.
- Media base units: 400–500 mm deep; ventilate AV gear with 20 mm plinth gap or grille.
Checklist: get it right the first time
- Measure like a pro: note out-of-plumb walls and beam heights; plan scribe and shadow gaps.
- Map services: radiators, floor heating loops, wiring, and ventilation—avoid blocking airflow.
- Plan logistics: can modules clear the staircase, or do we schedule a window hoist and protect joinery?
- Secure permissions: check VvE house rules; consult Monumentenzorg for listed interiors.
- Choose materials: low-VOC finishes, FSC timber, moisture-rated boards for wet zones.
- Think maintenance: hinged service panels, removable plinths, and standard hardware for easy repair.
- Sound and fire: acoustic seals for laundry/tech cupboards; fire-safe cable routes where needed.
The best built-ins don’t shout. They borrow the room’s lines, respect Amsterdam’s quirks, and quietly make every morning easier. Keep the palette light, the details honest, and the planning rigorous. When everything has a place, the daylight does the rest.