Lighting Design for Amsterdam Homes: Soft, Layered, and Local‑Smart
Amsterdam’s light is famously gentle—months of natural overcast give us a calm, diffused sky. The best residential lighting here doesn’t fight that mood; it extends it. Think layers, warm dimming, and low‑glare fixtures that feel effortless at 08:00 and 22:00. Below is a practical, locally grounded guide to help you decide what to place, where to wire, and how to control it—so your home looks good on a grey Tuesday and a bright summer evening.
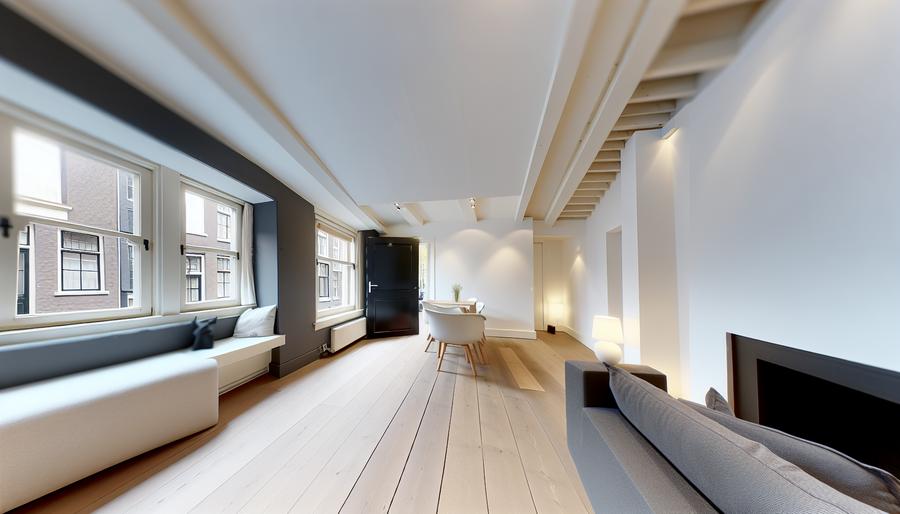
Start with the sky: embrace soft daylight
On an overcast day, daylight is broad, shadowless, and cool in tone. Mirror this indoors with matte surfaces and indirect light. Limewashed or matte-painted walls bounce light without glare; satin is fine for kitchens, but avoid high gloss if you want a calm, even atmosphere. Use light, open-weave curtains to push daylight deeper into the room, and keep window reveals tidy—clutter near narrow canal-house windows can steal precious lux.
Orientation matters. North- and canal-facing rooms feel cooler; lean on 2700–3000K lamps and warm-dim fixtures for evenings. South- and west-facing rooms can handle slightly cooler task lighting (3000–3500K) without feeling clinical, because sunset warmth will do the heavy lifting later.
Build three layers: ambient, task, accent
Ambient is your base layer—soft, even light you can live in. In Amsterdam’s older homes, ceiling voids are often shallow or interrupted by beams. Instead of a grid of recessed downlights, use surface-mounted cylinders, low-profile tracks, or perimeter uplighting. Aim for roughly 100–200 lux general illumination in living spaces. Pick lamps around 2700–3000K with a high color rendering index (CRI 90+) so timber floors and artworks look natural.
Task lighting should be targeted and brighter, around 300–500 lux where you need it. Over kitchen counters, use under-cabinet LED strips with a proper diffuser to avoid diode dots; 3000K keeps food looking appetizing. Desks want focused beams (24–40°) from a table lamp or track head. In bathrooms, mirror lights that throw forward (not just up/down) make grooming easier—choose IP-rated fixtures suitable for your zone.
Accent adds depth and mood. Wall washers on textured plaster, a beam onto a plant, a picture light for art—all around 50–150 lux. The trick is restraint: two or three accents per room are enough to give hierarchy. Consider dim-to-warm fittings (down to ~1800–2200K) for evenings; the amber shift feels naturally Dutch-cozy without tipping into orange.
Amsterdam realities: monuments, VvE, and narrow stairs
If you live in a listed grachtenpand or a 19th‑century belt home, Monumentenzorg typically restricts cutting into historic beams, ceilings, and façades. Plan for surface-mounted (“opbouw”) solutions: slim tracks painted to match the ceiling, porcelain or brass surface conduit, or skirting-level cable routes. Magnetic 24V track can carry multiple heads with minimal fixing points, while keeping the fabric of the building intact. Recessed downlights are often a non‑starter in beam ceilings—use compact surface cylinders instead.
For apartments, check your VvE (owners’ association) rules before adding façade lights, drilling in shared stair cores, or tapping communal power. Exterior fittings often need a uniform specification for the whole block. Motion sensors in common corridors must meet local safety and accessibility expectations; inside your private unit you have more freedom, but any new wiring still needs to comply with Dutch electrical standards, and a licensed installateur will help you keep paperwork tidy.
Narrow staircases are an Amsterdam classic—and a lighting challenge. Avoid low pendants that invite head bumps. Instead, integrate handrail or skirting lights with low glare (opalescent diffusers, 2700K) and directional “eyelets” on alternate treads. On very tight winders, wall-mounted uplights can wash the ceiling and visually widen the stair without dazzling.
Room-by-room moves that work
Living room: Pair a central pendant (large shade with diffuser) with two or three accent points—an uplight behind the sofa, a wall washer on the bookcase, a picture light. Add a floor lamp with a warm-dim bulb for evenings. Keep the pendant high enough for sightlines under historic beams.
Kitchen: Think layers on separate circuits: diffuse pendants over the island at 2700–3000K, under-cabinet strips for task, and a soft cove or top-of-cabinet wash for ambience. If your ceiling is uneven (common in older houses on piles), choose adjustable surface spots on track instead of fixed recessed cans to avoid crooked shadows.
Bathroom: Zone correctly. Inside a Dutch shower niche or near a bath, use at least IP44 (often IP65 in the actual shower). Pair a vertical mirror light (CRI 90+, 3000K) with a small ceiling downlight outside the splash zone. A warm night-light at skirting level on a sensor saves energy and sleep.
Bedroom: Avoid glare when lying down. Use offset wall-mounted reading lights with narrow beams (3000K) and a soft perimeter glow from a cove or concealed strip behind the headboard. Blackout curtains help sleep; add sheer voiles for daytime diffusion.
Hall and stairs: Presence sensors are practical for armfuls of groceries. Use low-output, wide-beam fittings to avoid harsh pools of light on old treads. Where ceiling height is tight, run a slim track down the center or one side to keep the corridor legible without head-knock risks.
Workspace: North-Holland’s grey afternoons will test your desk lighting. Combine a CRI 90+ desk lamp (3500K can aid alertness) with ambient fill so your monitor isn’t the brightest object in the room. Keep beam angles controlled to avoid reflections on screens.
Controls, color, and efficiency
Good control is half the design. Put ambient, task, and accent on separate circuits where possible; if not, choose smart dimmers with scenes (Morning, Cook, Relax, Late). Warm-dim or tunable-white is worth it in living spaces; static 3000K is fine for kitchens and work zones. In small apartments, two circuits plus portable lamps can still deliver layered light if each source is dimmable.
Choose efficient LEDs with replaceable components when feasible—many Dutch homes see long duty cycles in winter. Look for accurate specs: CRI 90+, R9 above 50 for warm reds, and a tight color tolerance (within 2–3 SDCM) so replacements match. Well-designed lighting won’t single-handedly improve your energy label, but it reduces winter consumption and heat build-up from old halogens.
Quick homeowner checklist (5–7 items)
- Map your layers: one ambient source, one or two task sources per activity, two accents per room.
- Pick color temps by function: 2700–3000K for living/sleep, 3000–3500K for kitchen/desk; CRI 90+ everywhere.
- Respect the fabric: in monuments, favor surface-mounted tracks and conduits; avoid cutting into beams.
- Plan circuits early: separate ambient/task/accent if possible; add dimming and at least two scenes.
- Mind the stair: no low pendants; use skirting or handrail lights with low glare and sensors.
- Bathroom safety: select IP-rated fixtures by zone; add a night-light on a sensor.
- Test before you fix: mock up beam angles and heights with temporary bulbs to avoid glare and shadows.
If you’re unsure where to start, begin with surfaces and controls—matte finishes and good dimming unlock the calm, diffused atmosphere that suits Amsterdam so well. Then add task and accent pieces one by one. The result is a home that feels composed in every season, whatever the sky is doing outside.