The Dry Truth About Wet Rooms: Waterproofing That Lasts in Amsterdam Homes
Wet rooms are simple in spirit and unforgiving in execution. Do the layers right and you’ll enjoy warm floors, clean lines and a bathroom that still looks crisp in 20 years. Cut corners on the invisible parts, and you risk leaks, swollen wood, and tense chats with your downstairs buurman. Here’s how we plan wet rooms in Amsterdam and Noord-Holland—layer by layer, with costs and local realities.
The waterproofing logic: what each layer actually does
A reliable wet room is a system. Each layer has a job, and none can replace the other:
- Structure: Concrete slab or timber joists. On timber, confirm deflection is minimal (aim for L/360 or better). Stiffen where needed with additional noggins or structural boards.
- Slope formation: Floors must fall 1–2% toward the drain. On timber, a pre-formed XPS or mineral foam tray is the cleanest way to get the gradient without heavy screeds. On concrete, a bonded screed can be used, but keep thickness modest.
- Drain: Choose linear or point drains with a 50 mm trap, adequate flow (think 30–60 l/min for rain showers), and an integrated flange for the membrane. Place it where you can clean it easily—along the long wall is ideal.
- Primary waterproofing (“tanking”): This is the hero layer. Either a sheet membrane with sealed joints, or a liquid-applied membrane with reinforcing tape at corners. Run it at least 150–200 mm up walls and fully behind the shower area to at least 2 m height.
- Decoupling: In timber buildings, a decoupling layer helps absorb micro-movement so grout lines don’t crack. Some sheet membranes combine tanking and decoupling; otherwise use a separate mat.
- Adhesive + finish: Flexible C2S adhesive for porcelain/ceramic; specialist systems for microcement. On floors, choose tiles with decent slip resistance (R10 or higher is a safe bet).
- Joints: Use epoxy grout in constantly wet zones, or high-quality cementitious grout with a sealer if you prefer a softer look. At every change of plane (floor-to-wall, internal corners) use sanitary silicone, not grout.
Before tiling, we always do a flood test: plug the drain, fill the shower area a few centimetres, and leave it for 24 hours. No drop, no damp marks below—only then do we proceed.
Amsterdam realities that change the plan
Wooden joists and weight. Many canal houses and 19th-century apartments sit on timber floors over pile foundations. Heavy cement screeds and natural stone can overload older joists and increase deflection. We typically specify lightweight build-ups: structural boards, a pre-formed sloped tray, sheet membrane, and porcelain tiles. If you love the seamless look, microcement can work—but the substrate must be very stable and properly waterproofed first.
Drain height and plumbing stacks. In older buildings, you might not have the depth for a recessed trap. Dutch shower drains generally need 75–90 mm including falls. If that’s not available, a gently raised platform (30–50 mm) can keep everything legal and dry, with a neat shadow gap at the perimeter. Moving soil stacks is rarely allowed in Monument buildings and often restricted by the VvE, so plan the drain location around the existing fall path.
VvE approvals and neighbourly peace. Changing a bathroom layout, adding a wet room where none existed, or altering drains often requires VvE consent. Expect to show drawings, details of waterproofing, and sometimes an acoustic plan. Impact noise travels through timber floors; adding a thin acoustic layer beneath the tray or structural board helps meet Dutch comfort expectations and prevents complaints.
Monumentenzorg constraints. In protected buildings, you may be barred from chasing walls for pipes or venting through a historic façade. Surface-mount copper runs, low-profile ducts routed to existing roof penetrations, and reversible build-ups will keep the inspector happy while giving you a modern shower.
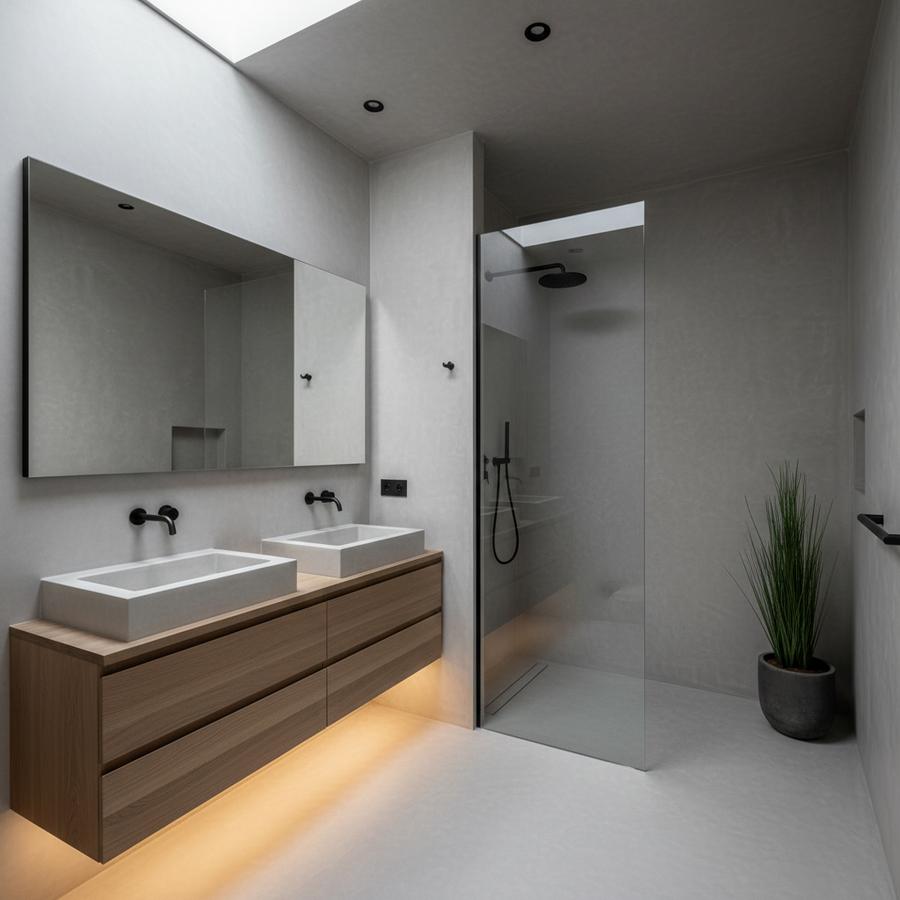
Choosing systems and details that actually work
Sheet vs liquid membrane. On timber floors, we prefer sheet membranes for consistency: seams are visible and testable, and movement is better accommodated. Liquids can be excellent on solid masonry or concrete, but they need correct thickness and cure time—no shortcuts.
Linear vs point drain. Linear drains allow a single-plane fall and clean tile layouts with large formats. They cost more but simplify cuts and are easy to squeegee. Point drains are economical and compact, but require a four-way fall; small-format tiles or mosaics are kinder around the drain.
Walls and niches. Use moisture-stable boards (cement-based or coated foam) in shower zones. Pre-formed waterproof niches save headaches—then wrap the membrane into them with corner pieces. Tile backer screws should be sealed or covered by the membrane.
Underfloor heating and ventilation. Electric UFH warms surfaces and helps dry the floor—keep it out from under the drain. Good extraction (75–100 m³/h with a humidity sensor) prevents mould on cold Dutch mornings. Where you can’t route new ducts, upgrade the fan and ensure continuous trickle extraction.
Finishes. Porcelain is durable, light, and low-maintenance. Natural stone looks beautiful but demands sealing and gentle cleaners; in hard Amsterdam water, limescale is relentless. If you choose stone, consider honed finishes and a squeegee habit.
What it costs in Noord-Holland (typical ranges)
- Survey and design: €300–€900 (especially if structural checks are needed)
- Subfloor stiffening: €400–€1,500 (timber joists, access dependent)
- Waterproof build-up (boards, tray, membrane, labour): €120–€200 per m² of wet zone
- Drain: point €120–€350; linear €350–€800 (quality, grate, flow rate)
- Electric underfloor heating: €60–€90 per m² plus €150–€300 for controls
- Ventilation upgrade: €600–€1,200 (fan, duct tweaks, controls)
- Tiling labour: walls €60–€90 per m²; floors €70–€110 per m² (layout complexity matters)
- Glass screen: €800–€1,800 (tempered, custom sizes carried up narrow stairs)
- Microcement (if chosen): €140–€220 per m² with specialist applicator
Plan a 10–15% contingency for surprises behind old walls, and allow extra time in Monument or VvE-managed properties.
A simple decision sequence that keeps you on track
- 1. Map the constraints: Joist direction, available floor depth, location of the stack, VvE/Monument rules.
- 2. Pick the drain strategy: Linear along wall if access allows; point drain if depth is tight.
- 3. Choose the membrane system: Sheet on timber; liquid acceptable on concrete with proper detailing.
- 4. Define the build-up: Lightweight tray vs screed; include acoustic layer if you have downstairs neighbours.
- 5. Lock in ventilation: Specify fan capacity and routing before finishes—retrofits are messier.
- 6. Finalise finishes: Slip resistance, maintenance, and how they can be carried up a narrow staircase.
- 7. Schedule a flood test: Make it a milestone before tiling proceeds.
Common mistakes we avoid (so you can too)
- Relying on “waterproof paint” instead of a continuous membrane with sealed corners.
- Forgetting movement joints at perimeters and every 3–4 m—cracks will find you.
- Insufficient fall to the drain, especially with linear drains set too far from the wall.
- Skipping upstands behind thresholds and at door lines—water loves edges.
- Specifying heavy screeds or stone without checking joists in canal houses.
- Installing beautiful but porous marble in a family shower without a maintenance plan.
A wet room is one of those spaces where the invisible work makes the visible work shine. Get the layers, local constraints, and details right, and you’ll enjoy warm feet, clean corners, and peace of mind—day after rainy day in Amsterdam.